
The Ultimate Guide to Photographing the Moon with a Foreground from Beginner to Pro!
DISCLOSURE: I may earn a small commission from some of the links below.
There are two ways to photograph the moon.
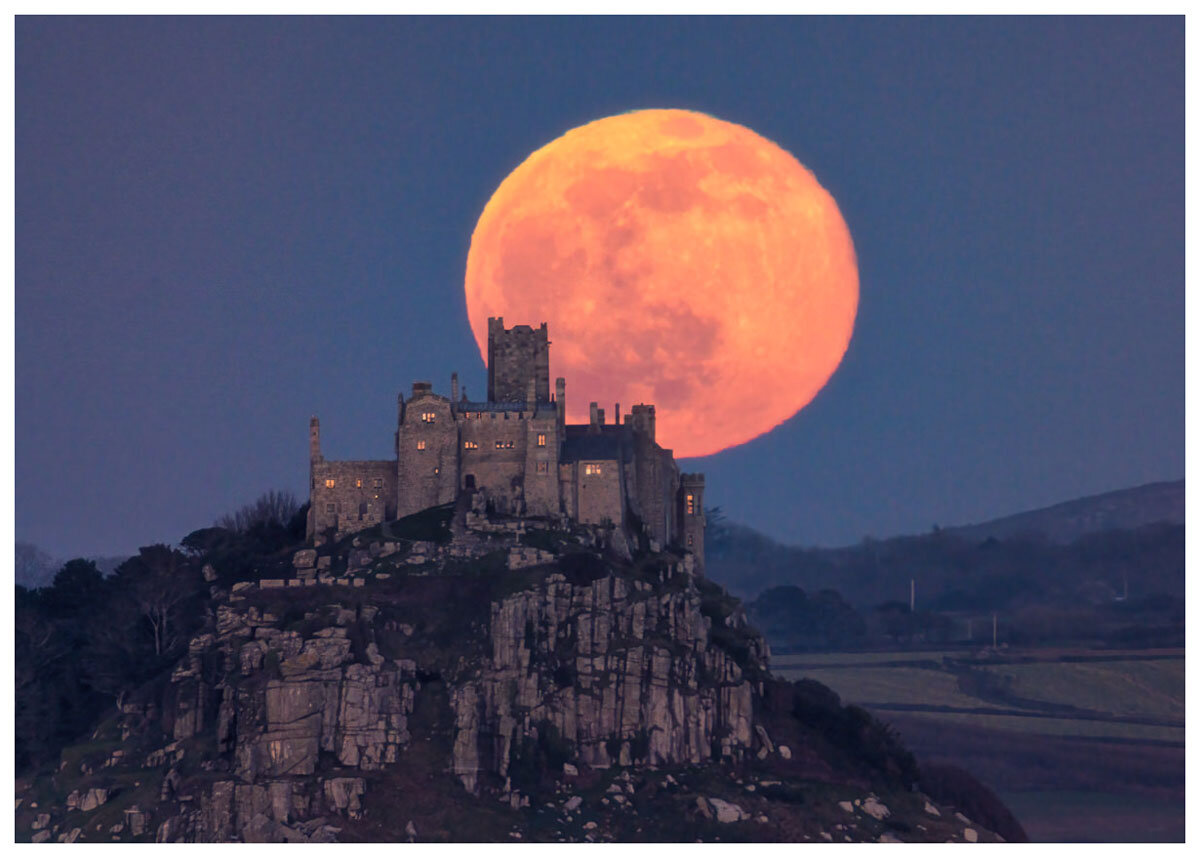
The first way is with a foreground that makes the moon look HUUGE and leaves your audience slack-jawed in utter AWE at your rockstar level photography skills!
The other way is where the moon just looks like a fuzzy, luminous white blob, against a black background.
Take, for example, these two photographs:
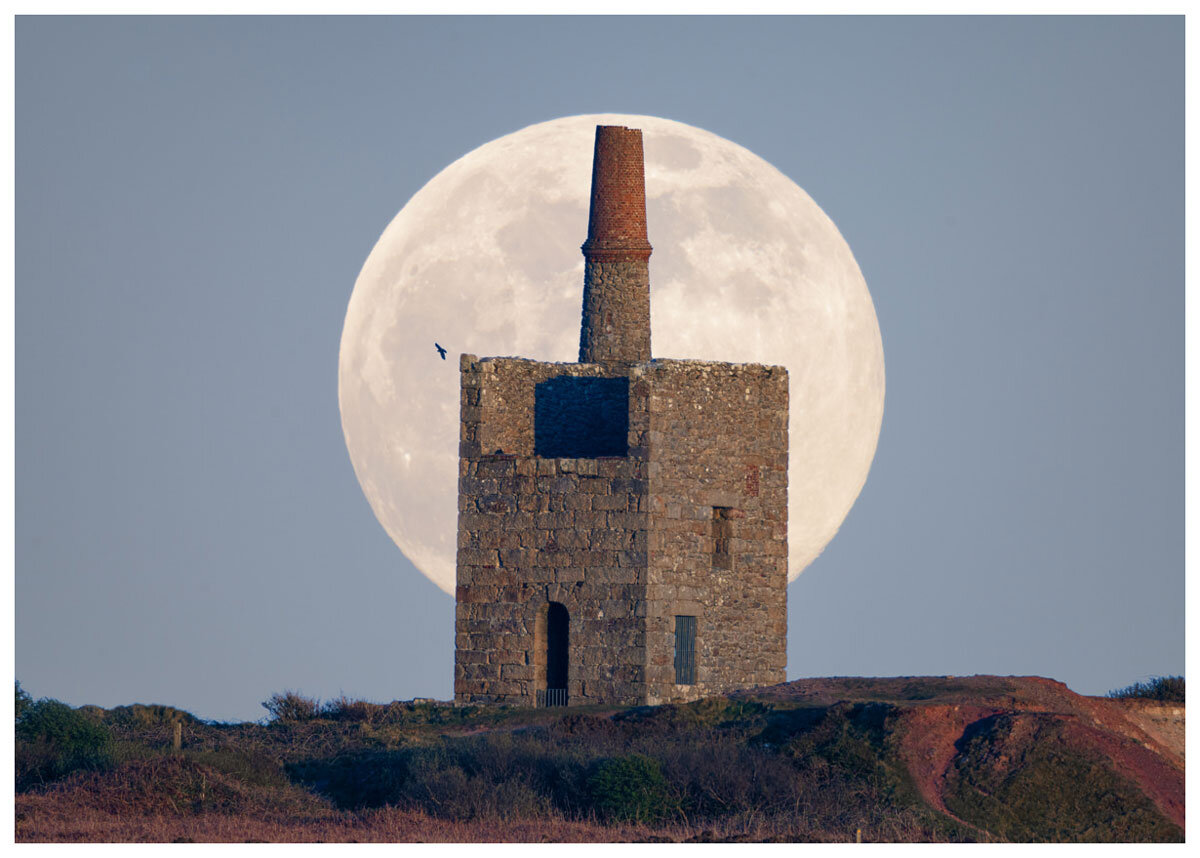
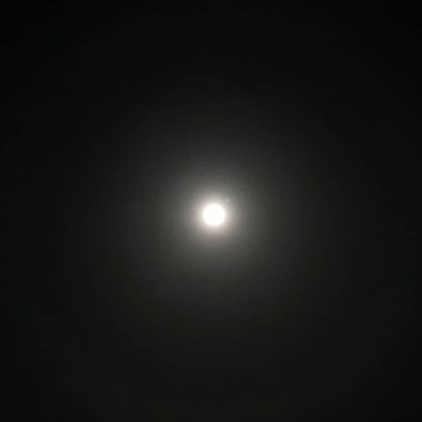
Image on left @darencox
Which photograph do you think would impress your friends?
So what do you need to do to get a shot of a giant moon like in the photograph on the left?
Read on, because in this post I’m going to let you into some of the pro moon photographers top secret tips!
Size really does matter

My moon kit: Sony A7R IV and the Sony 200mm to 600mm lens
The old adage that ‘size matters’ is especially true when taking shots of the moon.
More specifically, the size of the LENS on your camera really matters.
But before we talk about the kit you need to photograph the moon, let’s start by dispelling a few moon myths.
Myth 1
Many people falsely believe that when the moon is close to the horizon, it’s bigger than a moon that’s high in the sky, but that’s not true.
The moon is roughly the same size wherever it is in the sky - about 0.5° angular diameter or about half the width of your little finger at an arm’s length - after all, the moon is basically just a big rock and it doesn’t noticeably grow or shrink.
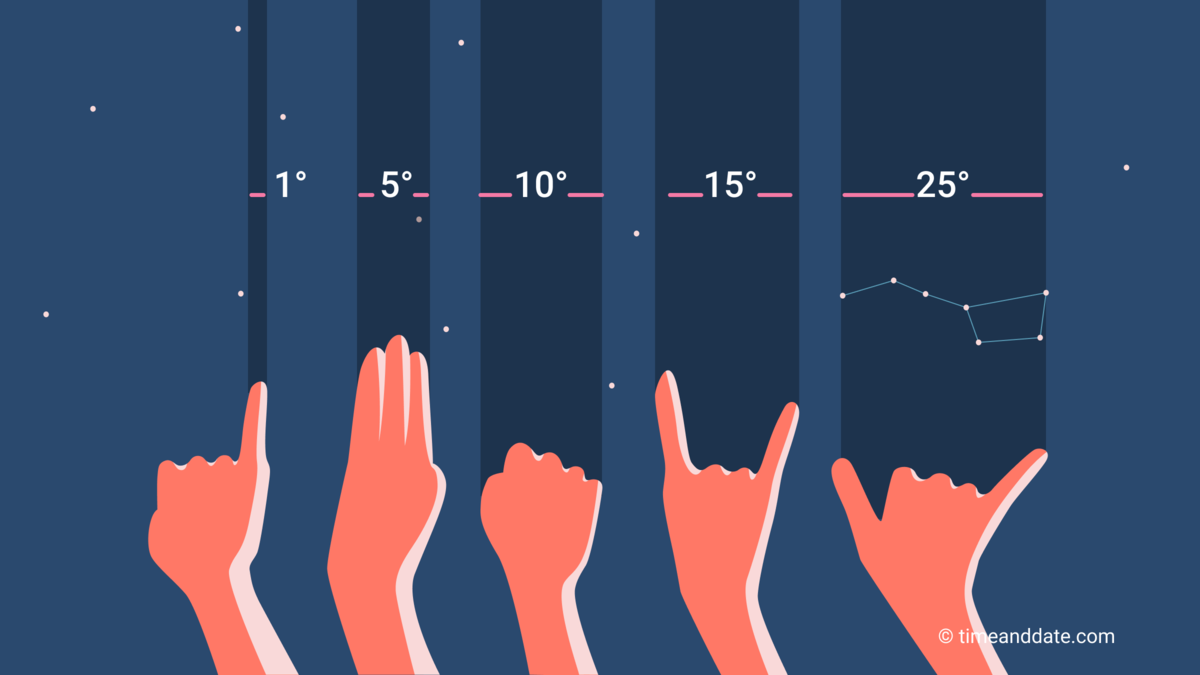
© Copyright timeanddate.com
Myth 2
The other common false belief people have about the moon is that you can only see a giant moon when there’s a supermoon, i.e. when the moon is closest to the Earth in its orbit (technically called a perigee syzygy).

© Copyright timeanddate.com
Whilst it IS true that the moon is slightly bigger during a supermoon, on average about 7% bigger than the diameter of a normal moon, and 14% bigger than the diameter of a micromoon (when the moon is furthest from Earth in its orbit, also known as apogee syzygy), this is barely noticeable day-to-day (or night-to-night).
PRO TIP
An interesting piece of trivia, if your mind can take it right now, is that the moon is roughly 400 times smaller than the Sun and the Sun is roughly 400 times further away from the Earth than the moon, making both the Sun and the moon look the same size in the sky! Hence one of the reasons we get really good solar eclipses because the moon is perfectly sized to cover the face of the Sun.
So you might be wondering by now, how DO you photograph a HUGE Moon?

© Copyright Daren Cox, 100 metre Supermoon over Brentor church, Dartmoor.
It’s actually quite straightforward but might require a bit of thought before the penny fully drops.
The moon is a long, long way away, on average 384,400 km (238,900miles) from Earth, and as we’ve already established, it’s roughly the same size in the sky (0.5°) wherever you view it and at whatever time of the day, or year, it is.
Therefore, you only have one option to make the moon look huge and that is to make your subject look SMALL by comparison!
To make your subject look small, be that a castle, person or landscape feature, all you need to do is put as much distance between YOU and IT as you can.
And when I say ‘as much distance’, I’m not talking about just a few feet or metres, I’m talking kilometres and miles of distance between you (the photographer) and your subject (a building, person, or landscape feature usually).
It stands to reason then, that if you, the photographer, are say, 4km away from your subject, be that a person, castle, or whatever, that subject is going to look very small indeed. Certainly much smaller than if the subject were just 4 metres away from you.
But, as we’ve already said, the moon stays roughly the same size (0.5°) no matter where on Earth you are and no matter where in the sky the moon is.
So, and this is the ‘magic’ bit … if you can catch the moon as it rises or sets over the horizon next to where your subject is, provided your subject is a long way away from you, then the moon (which stays the same size, 0.5°) will look huge by comparison to your now, very small subject!
If you’re still confused by what I’m saying, check out these 2 diagrams I prepared earlier to demonstrate what I mean.
In the first diagram, the subject (a house) is close to the photographer so the house looks big in the camera’s frame and roughly half the size of the moon in this example.

When the subject is close to the photographer it looks big compared to the moon. The moon size in the sky is always the same!
The moon is in the background, but as stated, it’s always roughly the same size in the sky (0.5°) and you can’t make the moon look bigger by walking closer to it, or smaller by walking farther away from it on Earth!
In the second diagram (below), the photographer has moved farther away from the subject (the house).
This has the effect of making the subject look a lot smaller (from roughly half the moon size in diagram 1. to say a sixth of the moon’s size in diagram 2.).
As the subject (house) is farther away now, but, the moon stays the same size (0.5°) as it always is in the sky, the moon now looks HUGE compared to the subject.

When the subject is far away from the photographer it gets smaller. Again, the moon size never changes in the sky!
The final part of the photographic trick then is for the photographer to have a very long telephoto lens to ‘zoom in’ on the subject so you can actually see it.
PRO TIP
As a rough rule of thumb, you can expect the apparent diameter of the moon (compared to the subject’s size) to grow by 10 metres for every 1km distant you (the photographer) are from the subject.
Examples
If you are 10km away from your subject, which is nicely aligned with the moon, you can expect the moon to look 100m in diameter compared to the size of your subject.
If you are 3.5km away from your subject, the moon you’ve aligned behind your subject will look around 35 metres in diameter.
So you can see that the farther you are away from your subject, the BIGGER the Moon appears to be in size compared to your subject!
We will talk about the photography kit required to shoot a huge moon in the next section, but before that, let’s do a quick summary of the main points.
Summary
For greatest effect, you need the moon close to the horizon so it can be contrasted with a subject of a known size, like a building, or person
The moon always stays roughly the same size in the sky (its angular diameter is approximately 0.5°, or half the width of your little finger at arms length), and even a supermoon is only about 7% bigger than a regular full moon
The moon and the sun appear to be roughly the same size in the sky, even though the moon is 400 times smaller than the sun, the sun is 400 times further away from the Earth than the moon
You need a large distance (kilometres ideally) between the photographer and the subject to make the subject look small compared to the moon
You need a ‘long’ telephoto lens to be able to ‘zoom in’ and see the subject in the camera frame
The moon appears to ‘grow in size’ compared to your subject by roughly 10 metres for every 1km distance you are from it.
Moon shooting photography kit
I’ve already mentioned you need a telephoto lens in order to shoot a giant moon and that in moon photography, lens size really does matter, so the longer your lens, the better.
As the moon is so bright, you don’t need a really fast and hence expensive telephoto lens to photograph it, pretty much any old lens will do so long as you can focus it nice and sharp.
When telephoto lenses are properly zoomed in, they tend to exaggerate any camera shake, so you also need a tripod to keep your camera and lens stationery and a remote shutter release, as even pressing the button on the camera can cause the camera to move slightly, blurring your image.
When you are zoomed in, especially above 600mm focal length, a slight wind or even ground vibrations can cause a noticeable shake and blur in your photos, so be careful where you set up.
If possible set up out of the direct wind (or try to deflect the wind around your set up if it’s gusting), and be careful where you stand, especially if the ground is soft, as where you tread may cause your tripod to move.
Next, here’re 3 moon photography kit setups from pro, to advanced, to beginners level I recommend:
PRO SETUP
Mirrorless camera
Full Frame
600mm lens
2x teleconverter
Remote shutter release
Sturdy tripod
Ballhead
L-Bracket (optional)
ADVANCED SETUP
DSLR or Mirrorless camera
Full, APS-C or Micro-4/3
300mm lens
2x teleconverter
In camera shutter delay
Regular tripod
Ballhead
L-Bracket (optional)
BEGINNERS SETUP
Any camera with a 200mm+ lens focal length, that includes modern mobile phone cameras!
The PRO Setup

Pro moon photography setup, click for more information.
This is what I would recommend if you are a pro-level photographer looking to sell your moon shots, or a serious amateur photographer, where budget is less of an issue.
I personally recommend a modern Mirrorless camera system where possible as you can see on-screen how the moon and your subject will be exposed. The brand is up to you, Sony, Canon, Nikon and others are all excellent.
Also, it’s better to have a zoom lens with a variable focal length rather than a fixed focal length to help frame your shot. For example, a lens with a variable focal length of 200-600mm is ideal.
For extra PRO bonus points, you can have an additional setup photographing a timelapse or video of the Moon as it rises or sets (see later video).
The ADVANCED Setup
This is what many amateur photographers can usually muster together, ideally with the addition of a 2x teleconverter (this doubles the focal length of your lens say from 300mm to 600mm usually at the expense of a few stops of aperture).
If you don’t have a remote shutter release (you really should as they don’t cost much) the camera shutter can usually be controlled using an internal camera setting to add a 3-second delay between pressing the shutter release button and taking the picture.
This delay allows the camera time to settle after pressing the shutter release button thereby reducing blur due to camera shake.
The BEGINNERS Setup
This is based on any camera you have to hand with a zoom lens, ideally, over 200mm in focal length (although the moon will be quite small even at 200mm, see photos below). The lens can be either directly built into the camera, or attachable.
As mentioned, even a modern mobile phone, for example, the latest Galaxy S21 with 3x optical zoom and 100x digital zoom(!) could probably take a good picture, although I’ve not personally tried it.
As with all setups, a tripod to hold your camera or phone still would improve the quality of your photo.
Size difference example
To see the difference between a shot taken of a subject at 1km and a focal length of 200mm (shot 1) versus a shot of a subject at 4.5km and a focal length of 934mm (shot 2), and a shot of a subject at 10.3km and a focal length of 986mm (shot 3), take a look at these two examples, below:
All three shots are uncropped, unprocessed, single RAW shots from a full-frame Sony A7R IV mirrorless camera.
You can see there’s a HUGE difference in the size of the moon in each shot!
As you will recall, this is due to the distance of me (the photographer) from the subject and then my lens’ ability to ‘zoom in’ to reframe the subject.
Although the moon is smaller in shot 1., the angular diameter of the moon is still 0.5° in the sky in ALL shots.
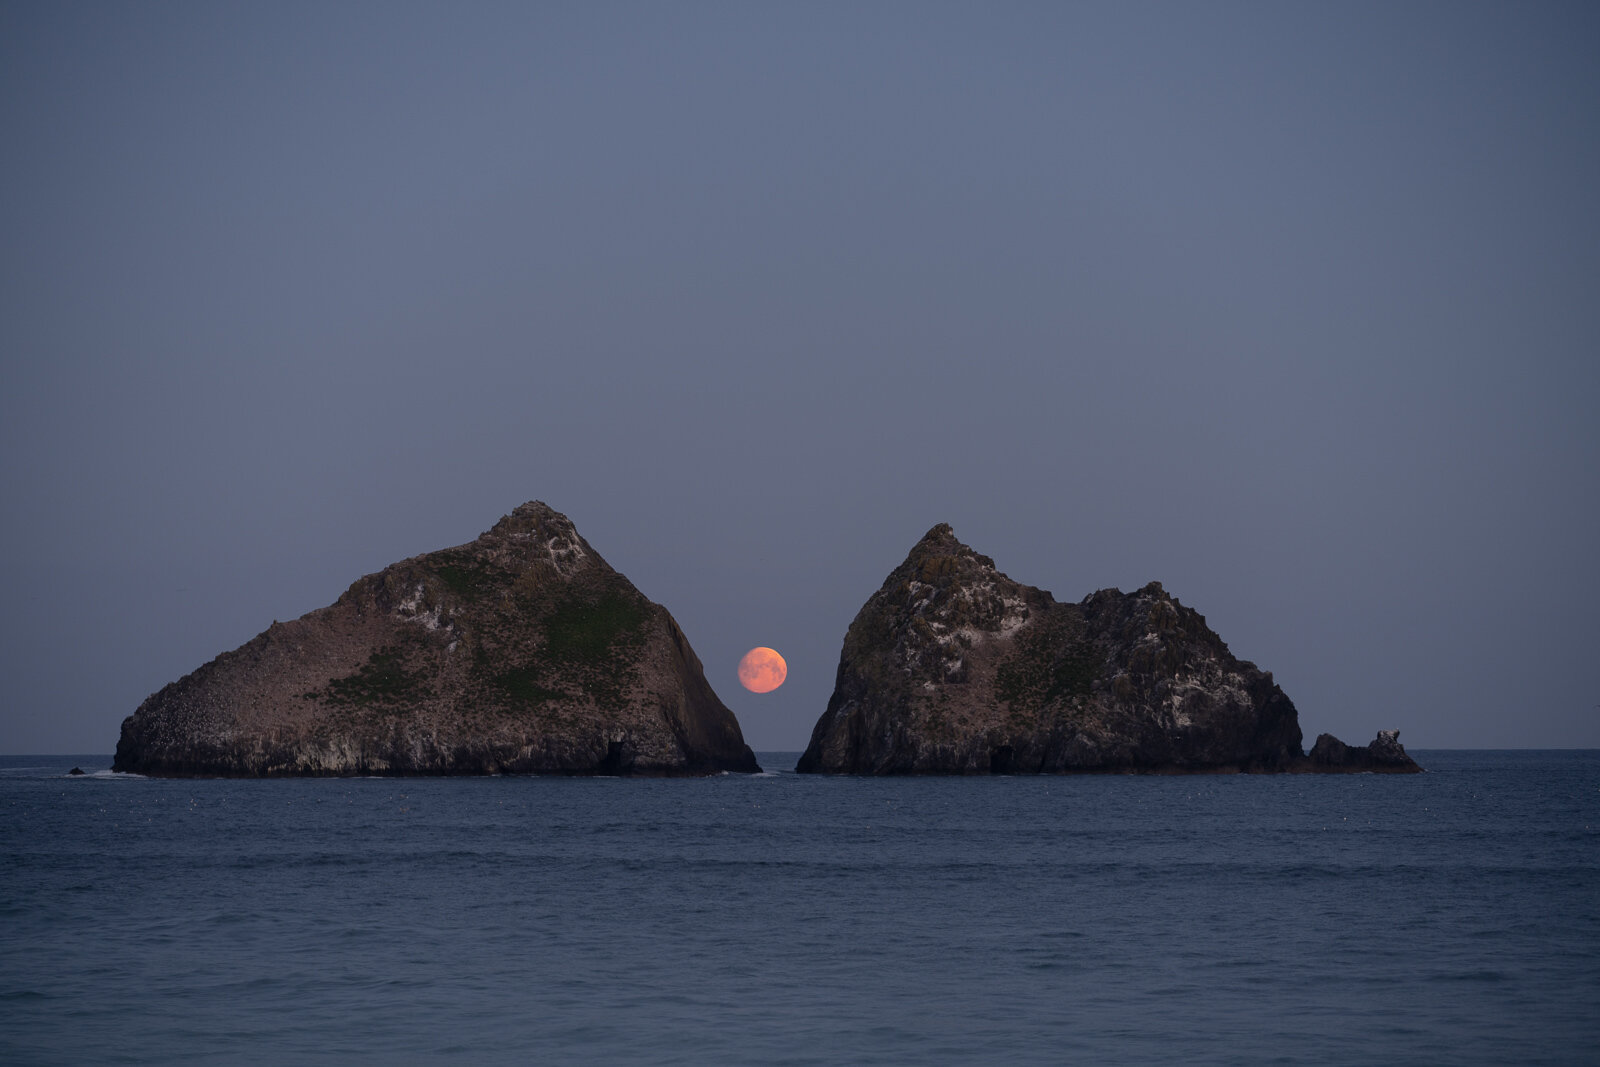
I would have loved to have made the moon in shot 1. even bigger, however, the beach I took the shot from is surrounded by high sand dunes making it impossible to create more distance between me and the rocks.
So, unless I can come up with something more creative (drone perhaps?), the 1km (0.63 miles) distance from the rocks to where I was standing on the beach in shot 1. is about as far away as I, or anyone, can get.
The moon in shot 1 is roughly 10m (33ft), compared to the rocks, the biggest moon that can be shot at this location (from the beach at least).
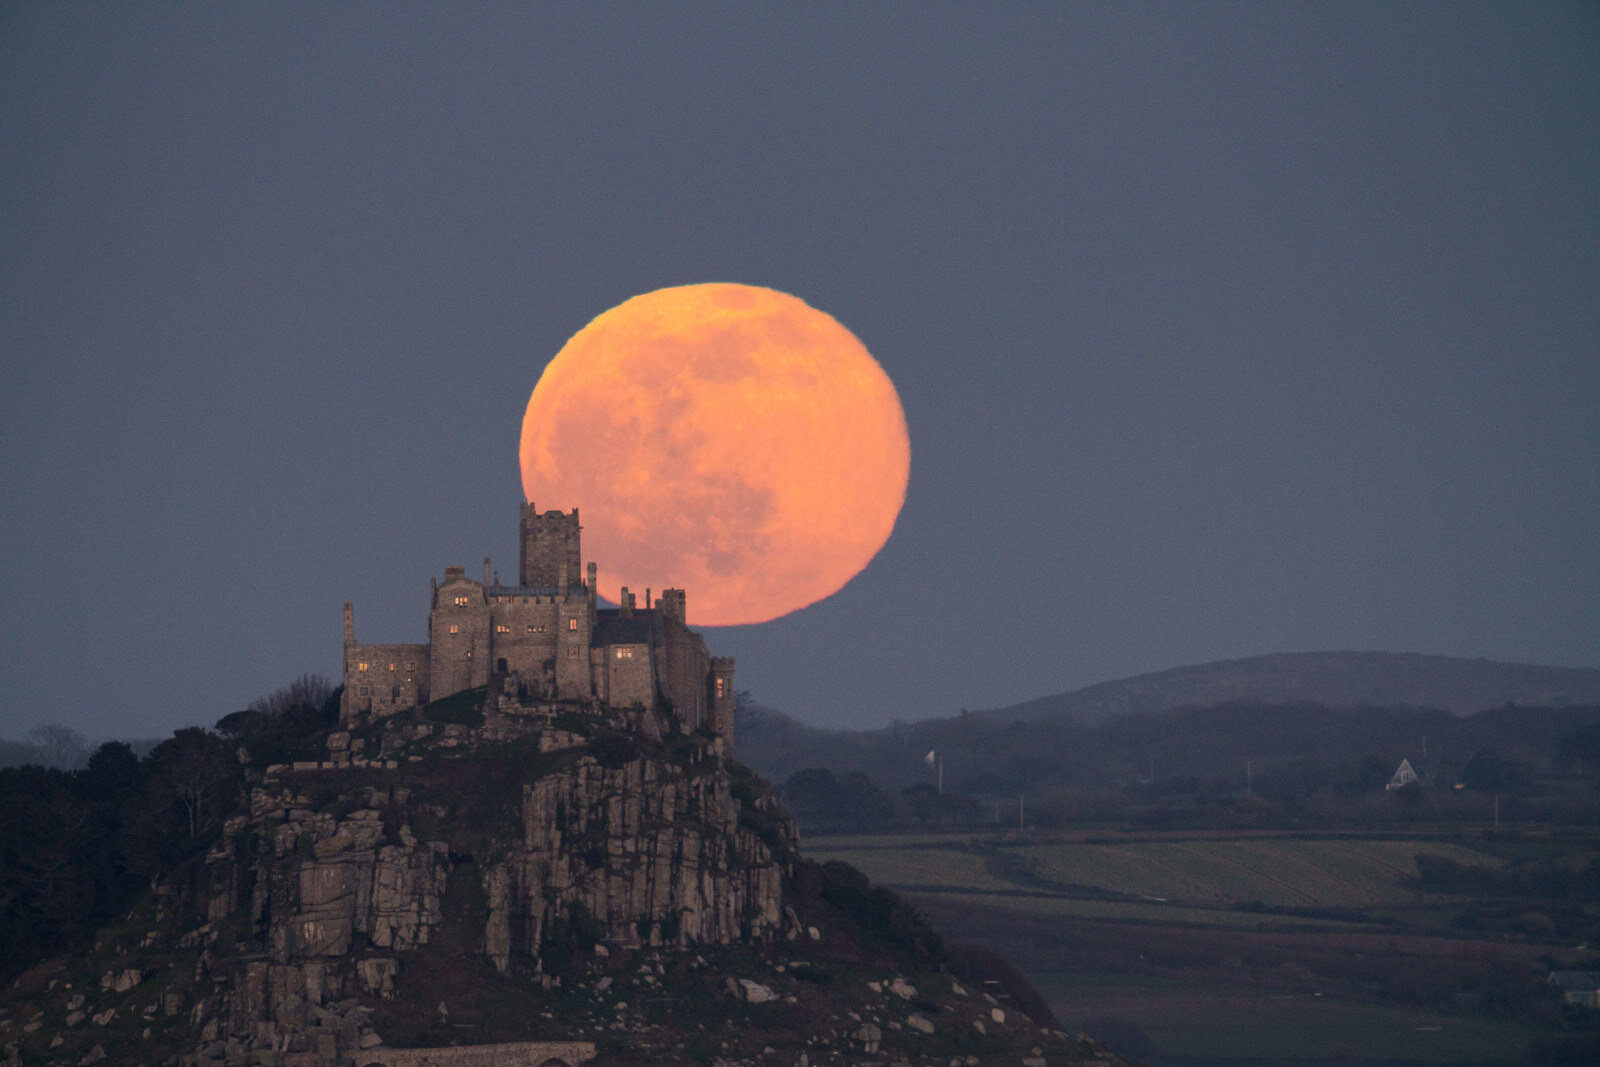
For shot 2. of the Snow Moon rising behind St Michael’s Mount, I was lucky to have a clear view across the sea from 4.5km (2.8 miles) away, shooting from Newlyn harbour wall. This gave the moon an impressive apparent size of 45 metres (145ft) compared to the castle.
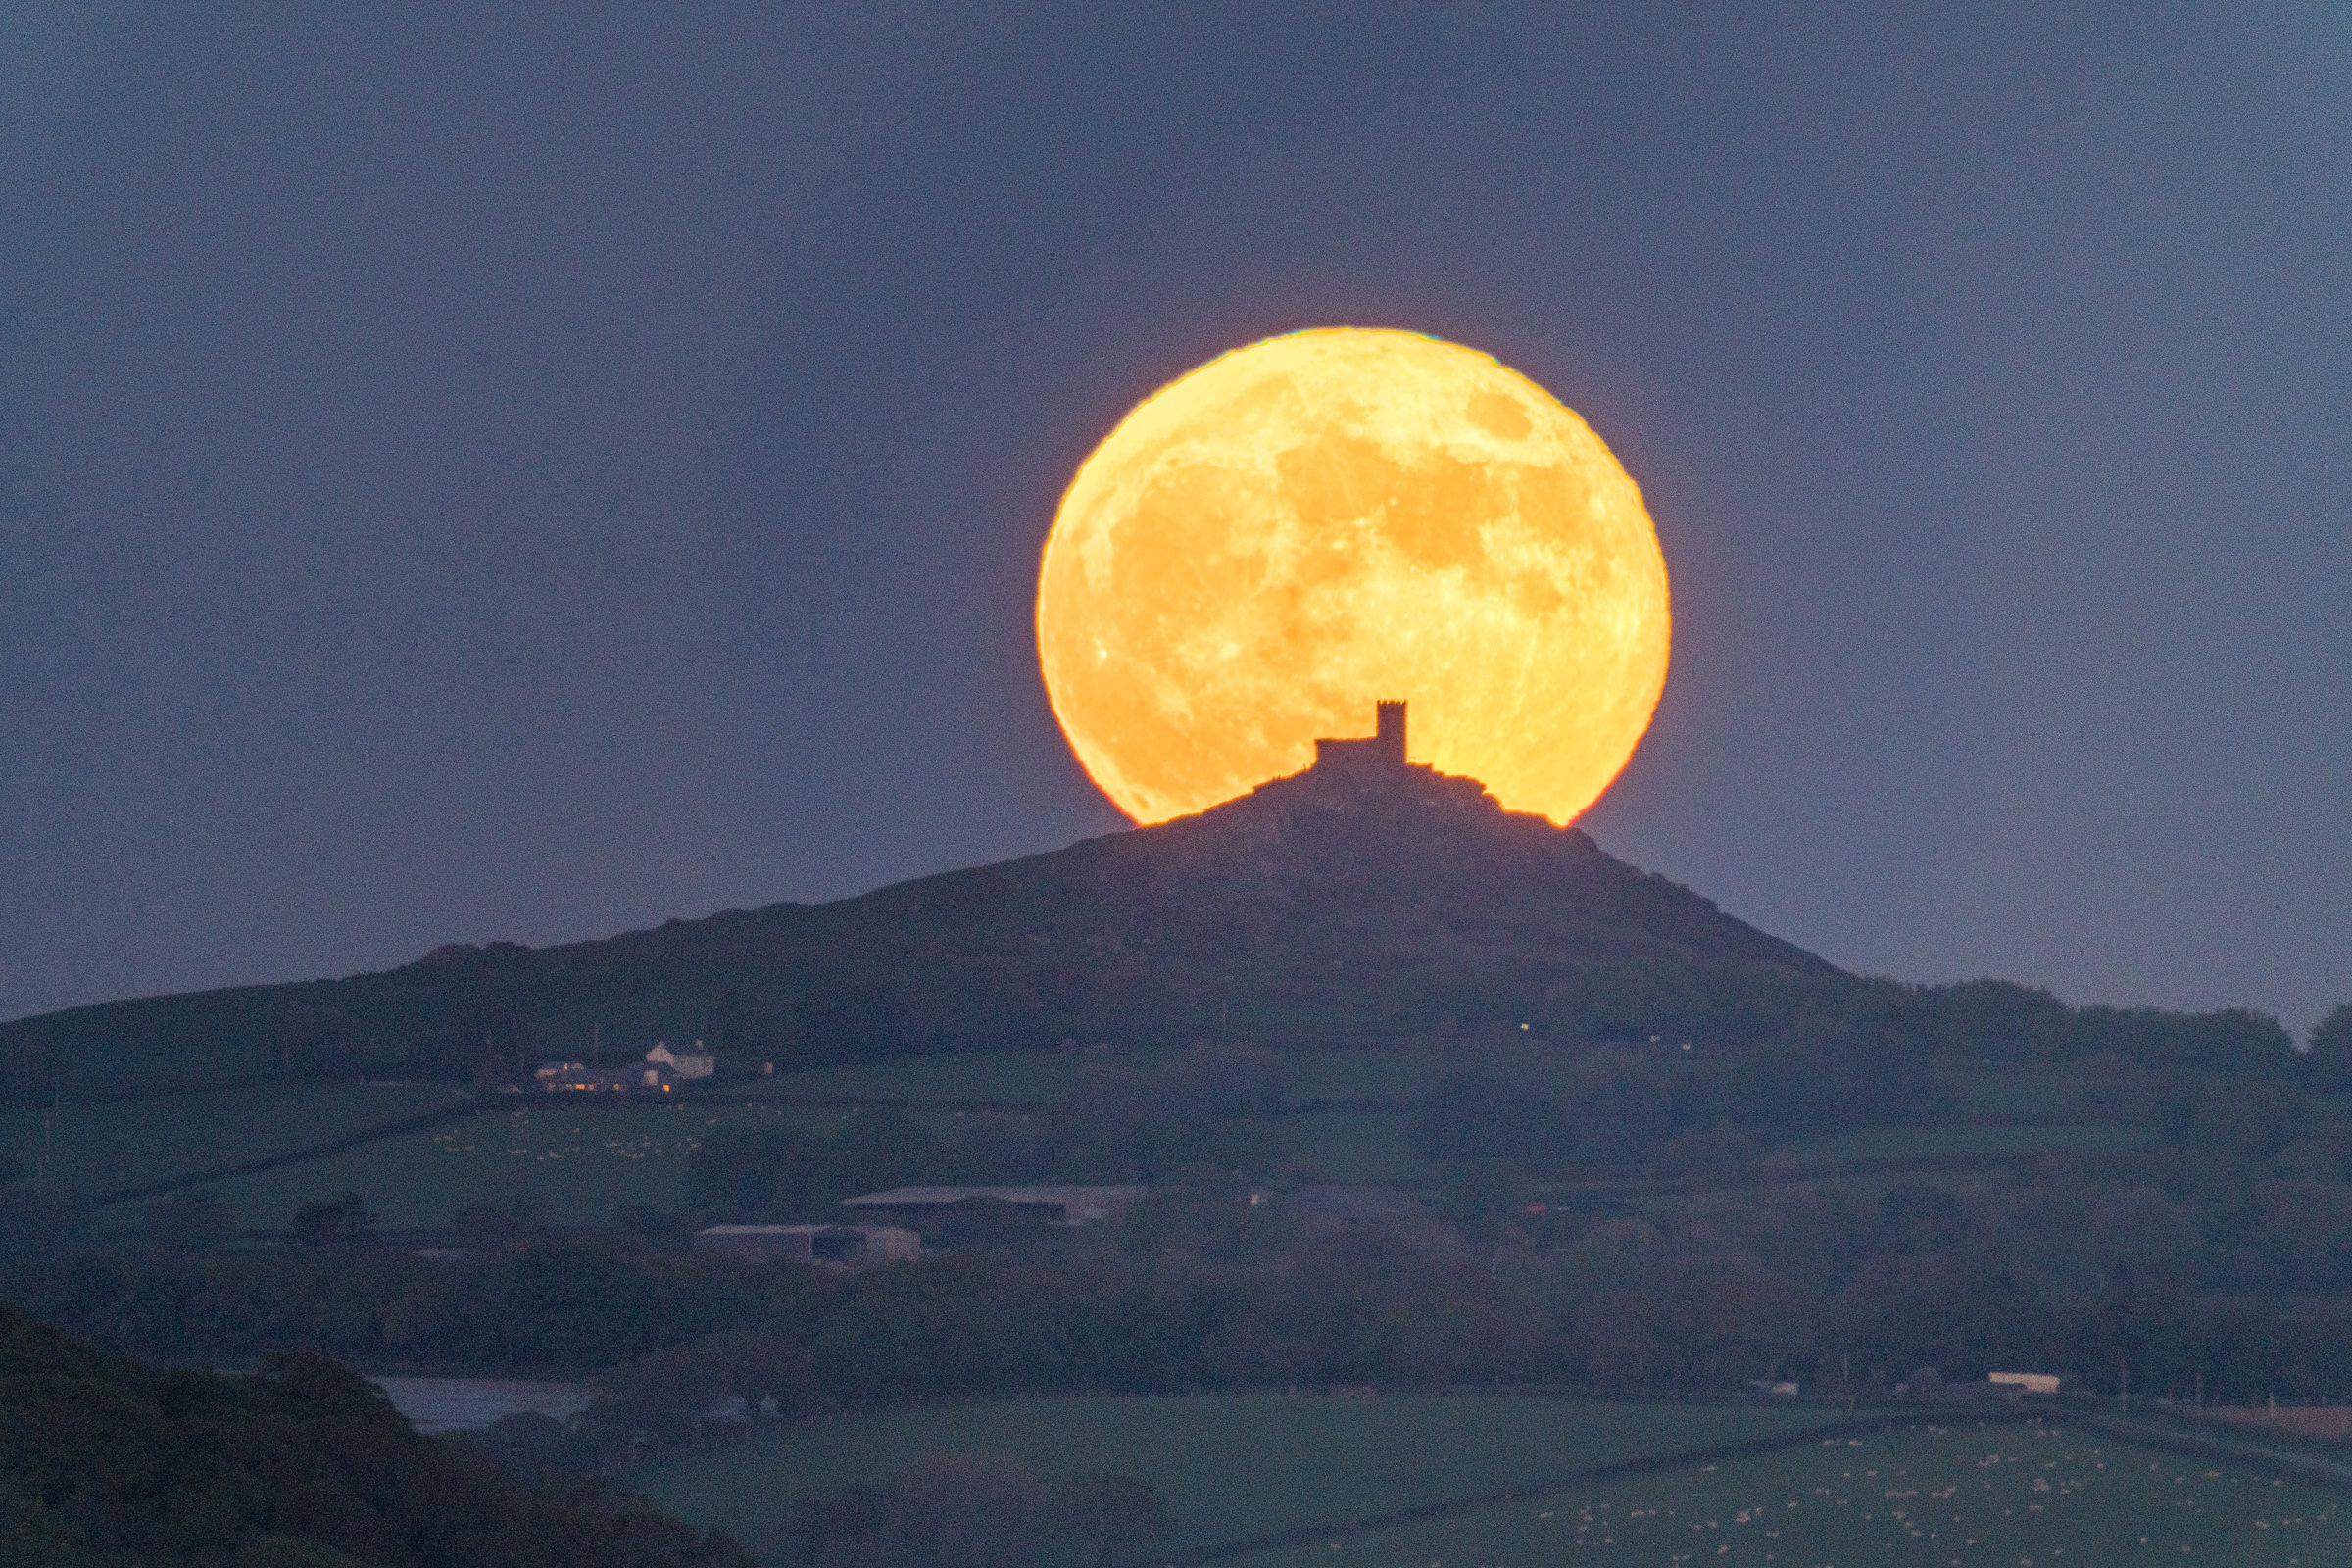
And in shot 3. of Brentor church, I was 10.3km (6.4 miles) away, giving an apparent moon size of just over 100m (333ft) compared to the church!
Effect of camera sensor size on lens zoom
The final thing to take note of in your kit is your camera’s sensor size.
Camera sensors come in many different sizes these days:
Full-frame sensor cameras, 1x crop, the standard all the others are compared against
Medium format sensor cameras, with a 0.64x crop (compared to a full-frame sensor)
APS-C sensor cameras, 1.5x to 1.6x crop (compared to a full-frame sensor)
Micro-4/3’rds sensor cameras, 2x crop (compared to a full-frame sensor)
1” sensor cameras, e.g. on a consumer drone, 2.7x crop (compared to a full-frame sensor)
Tiny 1/2.55” sensor cameras, e.g. on a mobile phone, 5.62x crop (compared to a full-frame sensor).
I won’t go into detail about how sensor size affects the light capture and quality of your photos, if you want to read more on this subject to satisfy your inner geek, then I recommend you check out this excellent article written by Capture the Atlas.
But, for moon photography purposes, the main thing to note is that the sensor size your camera uses will determine how much your shot is ‘cropped in’ compared to what you would see on a standard full-frame camera.
For example, I have an old Panasonic GH5 camera with a Micro 4/3rd’s sensor and a 100mm to 400mm lens. Due to the sensor size (above) it has a 2x (2 times) the zoom, or more accurately, 2x the crop factor.
This is comparable to my main camera, a full-frame Sony A7R IV with a 200mm to 800mm lens in terms of its zoom capability!
However, it’s worth noting that the Sony camera’s larger sensor will be capturing much more information than the Panasonic’s and so the resulting image quality will always be better, but for HD or even 4K video, the Panasonic is still pretty good!
Having said that, the Sony A7R IV also has the capability to switch the sensor to APS-C mode to give the effect of an additional 1.5x zoom.
Although you are collecting less information than the Sony in full-frame sensor mode, it can sometimes work to your advantage if you’re doing an HD or 4K timelapse and don’t need to capture as much extreme detail as the full-frame mode gives and will save processing time and storage.
Summary
The longer the focal length of your lens the better! 200mm-600mm is perfect (especially with an added 2x teleconverter!)
Get a tripod and a remote shutter release (or program your camera to delay shutter release by 3 seconds when you press the button to ensure the camera has stopped moving)
Try to shield your camera and tripod from the wind and watch out for soft ground when standing near your tripod as it may move the camera
A 2x teleconverter is a cheaper option than buying a new lens for extending the optical zoom of your existing lens(es)
Smaller camera sensors will have the effect of ‘cropping in’ your shot further giving you additional magnification
Do a timelapse or video if you’re feeling confident!
If you don’t have expensive camera kit yet, try using your mobile phone if all else fails, but set it up on a mini-tripod or stable surface before you take the shots.
OK, that just about rounds up all the kit required to photograph a huge moon.
Next, let’s talk about how you plan a full moon shoot!
Planning your full moon shoot
Hands down, the most important part of planning a great full moon shoot is having a great subject!
The subject might be anything:
a person (or people),
a building, like a castle, church or skyscraper
a tree
even a hill or a mountain (if you can get far enough away to make your moon huge compared to the mountain)

© Copyright Daren Cox. St Michael’s Mount in Cornwall makes an awesome subject, in this case, to go with February’s Snow Moon
The second most important factor is that the subject can be framed against a clear sky so that the moon can rise up (or set) behind it.
The third most important factor when planning a shoot is to shoot as close to the full moon as possible because it’s at this time that the moon rises and sets close to sunset and sunrise giving some natural light to illuminate your subject.
Of course, if you are happy to have your subject as a silhouette, or you are shooting a well-lit subject like a skyscraper, then this third factor is less of an issue, you can shoot any time of the month that the moon is visible in any of its phases except the New moon.
To plan a shoot, you need to be meticulous.
If you misjudge your position by even a few metres on either side of where you need to stand to align your subject with the moon you won’t get your shot.
When planning your shot you need to align 3 things:
You, the photographer
Your subject, the castle, tree, rock …
The moon, of course :)
Getting all three to line up perfectly (whatever your perfect happens to be) at exactly the right time in the right place can require painstaking planning and at times some luck. Thankfully, apps like PhotoPills can help you do this.
4 common things that will stop you from getting your shot
And now I have to let you in on the sad truth that not all the shots you dream up of your subject with a huge moon behind them are possible to shoot :(
I’ve come across 4 common issues that stop me from getting my shot:
1. Landscape contours and other obstacles in the way
If your subject is in a valley or dip in the landscape, you are never going to be able to get the moon behind it as the horizon line will be above the subject.
Also, obstacles, like trees, buildings, power lines, even hills, sand dunes and mountains can obscure your alignment.
So creativity can take you to a certain point, but sometimes your imagination is as far as you’re ever going to get!
2. The moon roughly follows the path of the ecliptic
This sounds complicated, but all it means is that the moon follows a similar path as the sun across the sky, technically this is called the path of the ecliptic.
The moon rises in the east and follows a path across the southern sky if you’re in the northern hemisphere (across the northern sky if you’re in the southern hemisphere) and then sets in the west.
This means in the northern hemisphere you need to be able to get to a position to the north and east or west of your subject to catch the moon setting or rising behind it.
Likewise, if you’re in the southern hemisphere (South America, Australia, New Zealand, etc.), you need to be able to get to a position to the south of your subject.
If you can’t position yourself correctly, for instance, you want a shot of the moon rising over an island that’s to your north (and it’s in the northern hemisphere), it’s likely the shot is impossible from land, so you better start arranging a boat!
3. The weather
The other huge obstacle to shooting the moon is the weather, especially here in the UK where I live as it rains an awful lot and rain equals cloud!
Having said that, weather forecasts (in the UK at least) are definitely not always accurate and even a slight break in the cloud can give you an opportunity to shoot your moon.

© Copyright XCWeather.co.uk
Not every weather forecast is accurate, if there’s a chance take the risk and get out there!
The weather can sometimes change unexpectedly in a matter of hours, even minutes, for the better or worse, so unless it’s absolutely sheeting down with rain and with little chance of it stopping anytime soon, it’s usually a good idea to just go out and take a chance, the worst outcome is you’ll get some fresh air!
3. Human error … :(
Although the majority of times it’ll be the landscape or weather that ruins your shot, human error can also be a factor and without doubt the most annoying when it happens!
For example, I went to shoot April’s full Pink Super Moon above an old mine ruin in Cornwall where I live.
Although I had meticulously lined up the shot in the PhotoPills app and the weather was perfect, what I didn’t realise is that I had lined up the moon with the wrong mine ruin, as there were actually 3 similar ruins in the area!
Of course, when it was time for the moon to rise, I couldn’t understand why I couldn’t see it? After all, the moon is ALWAYS on time!
Then, scanning across the horizon, I noticed the moon was perfectly aligned with a different ruin (but one that was barely visible from my location). Dooooohhh!
Human error can also manifest itself in forgetting kit 🤦♂️, especially batteries, SD cards, tripods, … even the camera itself (although that has never happened to me … yet!).
It’s worth having a checklist to run through before setting out to your location. For the SD card, I try never to remove it from the camera, instead opting to download pictures by plugging the USB cable into the camera directly. It’s one less point of failure!
PRO TIP
It’s always worth using a compass (or a compass app on your phone) when you arrive at your location and point it at your subject to get a bearing reading.
If you then compare your compass bearing reading with the Azimuth reading PhotoPills gives you between the Red and Black pins, it should match up pretty accurately. If it doesn’t you are probably standing in the wrong location or aiming at the wrong subject! (Wish I had thought of that BEFORE my Pink Super Moon shot).

PRO TIP
Always compare the bearing of where you are standing to your subject using a compass to the Azimuth of the red to black pin in PhotoPills to be sure you are standing in the correct location and shooting the right subject. © Copyright Photopills
Moon photography planning apps
These are my goto apps, and websites, for planning a moon shoot:
PhotoPills is my number 1 app recommendation for moon shoot planning (or Sun and Milky Way for that matter) - it gives you the rise and set times, location and the path the moon will take across the landscape, as well as the size that the moon will look based on your distance from the subject, plus a whole lot more! It’s totally indispensable!
Google Maps is next, especially for street-level views to check for line of sight obstacles between my shooting location and the subject
Next is your weather forecasting app of choice (I use XCWeather in the UK), in other countries you will have your own favourites. Any weather app that predicts the percentage cloud cover is especially useful
If you are shooting near the sea or a tidal zone, a tide prediction app (I use tidetimes in the UK), again, different for other parts of the world
When planning moon risings and settings from my desktop computer I also use the free web app, Photo Ephemeris, as it’s easier on the eye than using a mobile phone app, but falls a little short of the functionality that PhotoPills provides (but it is free on the web!)
And sometimes, I use the free Stellarium.org desktop space app to understand what else will be in the sky at the same time as the moon? For example, any planetary combinations.
Of course, none of this beats scouting out a location on foot before the shoot day if possible, so do the ground work with these apps, and, if you are able to, visit the site before your shoot to check everything out.
My full moon shoot planning process using PhotoPills
PhotoPills suggest a process of Imagine, Plan and Shoot, and I start off every moon shoot by imagining an awesome subject I’d like to shoot with the full moon behind, or very near to it.
It may be a local castle, a solo tree, even a person standing on a high ridge, like a hill or prominent rock. The sky is literally the limit when imagining your shots!
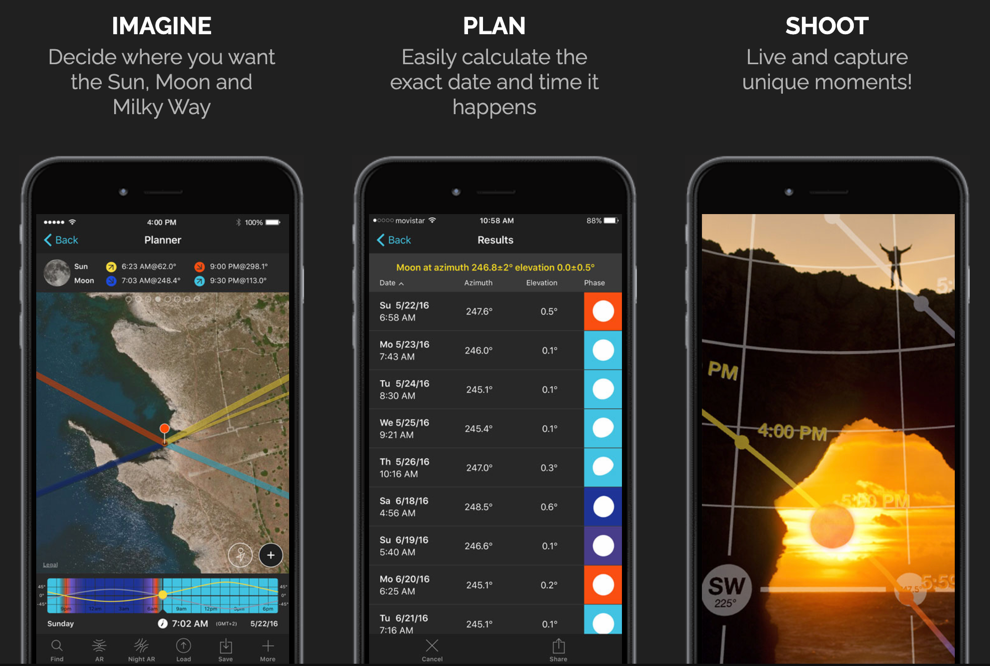
© Copyright PhotoPills
Once I’ve figured out a cool subject, I head into the PhotoPills app to see if it’s possible to get an alignment?
This is usually the most tricky part of the whole planning process and at times, the most frustrating, especially when you find out that it’s not possible!
The PhotoPills planning process
Download or open the PhotoPills app on your mobile phone.
1. Place the black pin directly over your subject
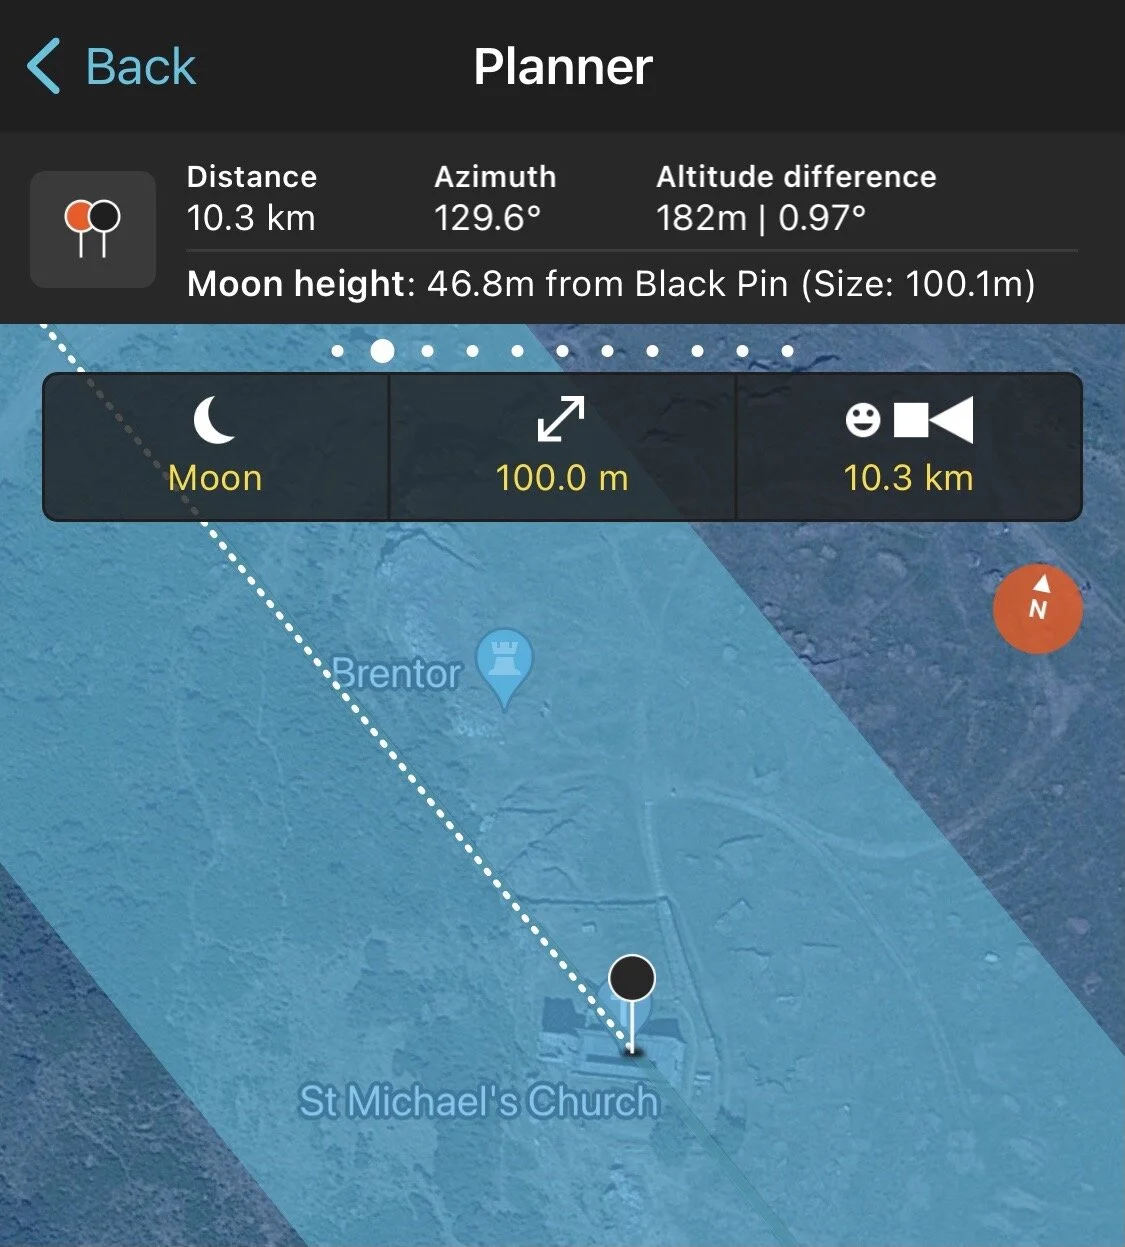
In this case my subject is Brentor church on Dartmoor
2. Next, turn on the Sun/Moon map settings

The map settings are linked from the main Planner page.
3. Enter the size of the moon you’d like to photograph, say 100m in this case

Enter the size of moon you want to shoot
Or, enter the distance you think you’ll be able to shoot it from? (e.g. 10.3km in this case)
If you don’t know either, just leave it blank as it’s just an aide to help you find the right spot.
4. PhotoPills draws a white circle around where you will need to be standing in order to take this shot with a moon of 100m in diameter

PhotoPills draws a white circle around the subject showing where you need to be standing to shoot a moon of that size.
In this instance, the white circle will have a radius of 10.3km!
5. Now move the red pin so it roughly aligns with the direction of the rising or setting moon with the black pin on the perimeter of the white circle.

For a rising moon, you will need to be roughly to the northwest of your subject (in the northern hemisphere) on a full moon.
If you are shooting a moonset, you will need to be to the northeast of your subject.
It’s the opposite in the southern hemisphere.
6. Now move the red pin so that the moon position at a specific time, e.g. moonrise is close to the thick blue line

The thick blue line shows the position of moonrise at the time and date selected.
The thin blue line (2.) shows the moon position as it moves in an arc across the landscape as time changes.
Note: The Moon height in PhotoPills is measured from ground level at the black pin to the centre of the moon.
So, for a shot of the moon with a slight overlap with your subject, make the Moon height (46.8m in this case), just less than half the moon Size (100.1m here).
7. Now keep moving your Red pin around until you get the Moon height at the height you want it above your subject.

I like to place my red pin on a country lane where possible as I can then go into Google Maps and check the Street View for line-of-sight obstacles.
If you’re off a road it can still work, but you won’t have the benefit of Street View. However, sometimes you can find user-uploaded 360-degree photos close to your red pin position if you’re lucky!
8. Once you have your initial setting, go to Google Maps then to Street view at the exact location you put your Red pin in PhotoPills and look to see if you can see your subject on the horizon?

If possible, do a check in Google Street View to see if you can see your subject from the Red pin position.
In this instance, Brentor church is a massive 10.3km away sat on a tor (hill), without any obstacles to viewing it.
You are going to need a very powerful lens to capture it though!
If it’s blocked by tree’s, houses, hills or other obstacles you’ll need to hunt around Google Maps and/or PhotoPills for a new location. Remember, you’ll need to be on the same diagonal line that aligns the Red pin, Black pin and the path of the moon at the set time and height!
Also, as you move your Red pin around, the time the moon rises or sets might change a little if the altitude at the place where you put the Red pin suddenly changes.
If this happens you will need to adjust your Red pin location to the left or right to account for the moon rise or set timing.
Repeat this process until you find a spot you’re happy with!
Note, it’s entirely possible that there is not a good spot to photograph your subject!
Or, it may be too close giving a moon that looks too small, or too far away for your camera lens to capture.
If that’s the case, don’t worry, we get the chance to shoot a full moon every 29.5 days and its location changes a bit every month!
Not to mention, there are, of course, other moon shooting opportunities in between full moons for example to shoot crescents.
Other ways to use PhotoPills to plan your moon shot
There many other ways to use PhotoPills to plan your shots.
One notable way is the Find function, where you can search for the moon at a certain location and altitude at dates in the future.
Using this function can sometimes give you a good indication if your moonshot is possible at all!

The Find function in PhotoPills allows you to find the moon phase at a certain azimuth and elevation from your red pin (if there is one!).
This can be useful for finding out if your shot is physically possible.
After you’ve placed the black pin on the subject, go ahead and place your red pin in the position you want to shoot from and then choose “Find” on the Planner menu (bottom left) and select “Moon at azimuth & elevation”.
Once PhotoPills comes back with a list of dates, sort the list by moon ‘Phase’ by clicking the column header once or twice.
Any red squares with a white filled circle are full moons at ‘golden hour’, the perfect time to shoot a full moon with a foreground.
Final Summary! When it all comes together …
If you’ve taken on board all my moon shooting tips and have access to the right kit, there’s nothing stopping you from getting the type of moon shots most people only ever dream of!
From individual photographic shots to time-lapses and video’s, there’s nothing stopping you no but your imagination … and maybe your kit!
I want to leave you with this REAL-TIME video I made of the May Flower Super Moon of 2021 rising behind Brentor church in Devon, UK.
Brentor church is a special place that I have visited many times over the years from a very young age and it was great to find a location and have the right weather conditions to shoot a 100 metre SUPER MOON video and photographs.
Here’s the video, hope it inspires you to shoot your own moon photographs and videos!
© Copyright Daren Cox. May 2021, 100 metre (333ft) Flower Super Moon rising in REAL TIME over Brentor church, Dartmoor, UK. Shot from 10.3km away!
Now it’s over to you
What did you like about this post and what do you think I may have missed?
Leave a comment below to let me know.
Before you go a quick request …
If you’ve read to the end of this article, you’re probably hungry for more information and knowledge on how to grow your photography business and develop your skills further?
If that’s the case, why not consider signing up for my free Photography Tips newsletter, see below.